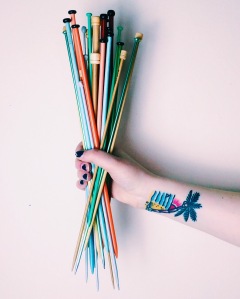
Sometimes I force myself out of my ‘knitting comfort zone’ and try to knit something a little bit harder than cute bows so I can learn new techniques. This often leads to a lot of frustration and the result is not always satisfying, but sometimes it turns out to be a lot easier than I initially thought.

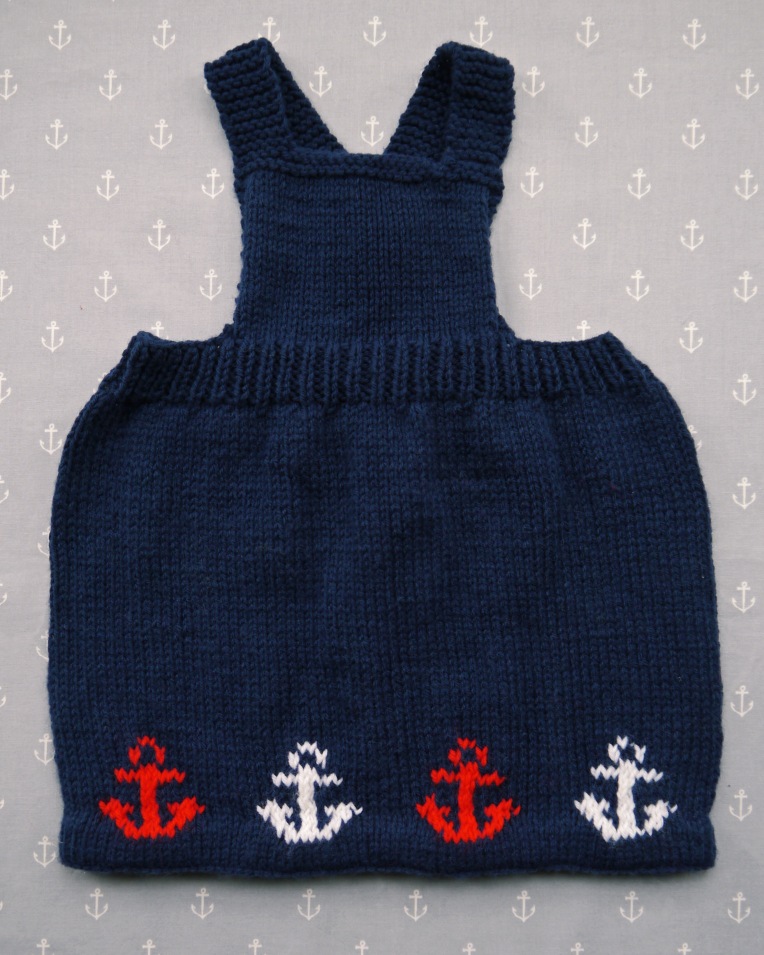
When I picked up my needles again a few years ago, I was given a huge folder of Creative Knitting patterns from the 80s which mostly featured – no surprise here – oversized jumpers). As a beginner at the time, the idea of trying to follow any of these patterns just terrified me! So the folder had been gathering dust in my knitting room ever since until a few months ago when, while tidying up my room, I flicked through the pages and came across this cute pinafore dress. I loved the style and decided to give it a go!
I wasn’t a big fan of the motif and, in order to make this dress a ‘Julie’ dress (as my friend Shivani would say), I went for a nautical theme instead and also changed the top design. I charted some anchors, looked for cute buttons in my stash, ordered some lovely yarn and I was ready to go!
I would have linked to the original pattern but I couldn’t find it online. So I have typed it below and included my tweaks . If you’re a beginner yourself when it comes to knitting clothing, do not worry, this is actually super easy.
Materials
– Pair of 3.25mm (US 3), 4mm (US 6) & 4.5mm (US 7) straight knitting needles
– DK acrylic & nylon yarn in navy, red and white – I used Sirdar Snuggly DK Light Navy (224), Flamenco (242) & White (251)
– Tapestry needle
– Scissors
– 2 buttons
Measurements
To fit chest approx. 46cm
Skirt width 65cm & length 17cm
Tension
22 stitches and 30 rows to 10cm in stocking stitch on 4mm (US size 6) needles.
Abbreviations
K – Knit
P – Purl
P2tog – Purl 2 stitches together
RS – Right Side
WS – Wrong Side

Instructions
Skirt:
– Using 3.25mm needles and navy yarn, cast on 142 stitches.
– Beginning with a Knit row, work 5 rows in stocking stitch.
– K1 row to form the fold line.
– Beginning with a Knit row, work 4 rows in stocking stitch.
Anchor Pattern: Change to 4.5mm needles and work the pattern using the Intarsia technique and stocking stitch – follow the written instructions or the chart (I’m a big fan of charts).

I know this looks pretty tiny, so you can get the (bigger) PDF chart here.
N=Navy – R=Red – W=White
ROW 1: K8N, *6R, 11N, 6W, 11N, repeat from * 3 times, K6R, 11N, 6W, 9N.
ROW 2: P7N, *2W, 1N, 2W, 1N, 2W, 9N, 2R, 1N, 2R, 1N, 2R, 9N, repeat from * 3times, P2W, 1N, 2W, 1N, 2W, 9N,
2R, 1N, 2R, 1N, 2R, 7N.
ROW 3: K6N, *2R, 2N, 2R, 2N, 2R, 7N, 2W, 2N, 2W, 2N, 2W, 7N, repeat from * 3 times, K2R, 2N, 2R, 2N, 2R, 7N,
2W, 2N, 2W, 2N, 2W, 7N.
ROW 4: P6N, *4W, 1N, 2W, 1N, 4W, 5N, 4R, 1N, 2R, 1N, 4R, 5N, repeat from * 3 times, P4W, 1N, 2W, 1N, 4W,
5N, 4R, 1N, 2R, 1N, 4R, 5N.
ROW 5: K6N, *1R, 3N, 2R, 3N, 1R, 7N, 1W, 3N, 2W, 3N, 1W, 7N, repeat from * 3 times, K1R, 3N, 2R, 3N, 1R, 7N,
1W, 3N, 2W, 3N, 1W, 7N.
ROW 6: P11N, *2W, 15N, 2R, 15N, repeat from * 3 times, P2W, 15N, 2R, 10N.
ROW 7: K10N, *2R, 15N, 2W, 15N, repeat from * 3 times, K2R, 15N, 2W, 11N.
ROW 8: P8N, *8W, 9N, 8R, 9N, repeat from * 3 times, P8W, 9N, 8R, 7N.
ROW 9: K10N, *2R, 15N, 2W, 15N, repeat from * 3 times, K2R, 15N, 2W, 11N.
ROW 10: P10N, *1W, 2N, 1W, 13N, 1R, 2N, 1R, 13N, repeat from * 3 times, P1W, 2N, 1W, 13N, 1R, 2N, 1R, 9N.
ROW 11: K9N, *1R, 2N, 1R, 13N, 1W, 2N, 1W, 13N, repeat from * 3 times, K1R, 2N, 1R, 13N, 1W, 2N, 1W, 10N.
ROW 12: P11N, *2W, 15N, 2R, 15N, repeat from * 3 times, P2W, 15N, 2R, 10N.
Change to 4mm needles – you will only use navy yarn for the rest of the pattern:
– Beginning with a Knit row, work in stocking stitch until the skirt measures 19cm from cast-on edge, ending with a Knit row.
Decrease:
– P2, *P2tog, P2, repeat from * to the last 4 stitches, P2tog, P2. 107 stitches.
Waistband Change to 3.25mm needles:
– RIB ROW 1: K1, *P1, K1, repeat from * to end.
– RIB ROW 2: P1, *K1, P1, repeat from * to end.
– Repeat these 2 rows for 2.5cm, ending with rib row 2.
Shape for bib:
– Cast off in rib 39 stitches at the beginning of the next 2 rows. 29 stitches.
Change to 4mm needles:
– Knit to end.
– K4, Purl to last 4 stitches, K4.
– Repeat these 2 rows until the bib measure 7.5cm from the beginning of shaping, ending with a RS row.
– Work in seed stitch for the next 4 rows – *K1, P1, repeat from * to end, K1.
Knit the straps (I knitted them in garter but wish I had done in seed stitch to make them even cuter!):
– K7, cast off 15 stitches, K to end.
– K7, turn your work and leave the other set of 7 stitches on a holder.
– Work in garter stitch until the strap measures 23cm.
– Cast off.
– Repeat this with the other strap.
Assembly:
– Join the centre back seam of the skirt.
– Fold the hem to WS along the fold line and slipstitch into place.
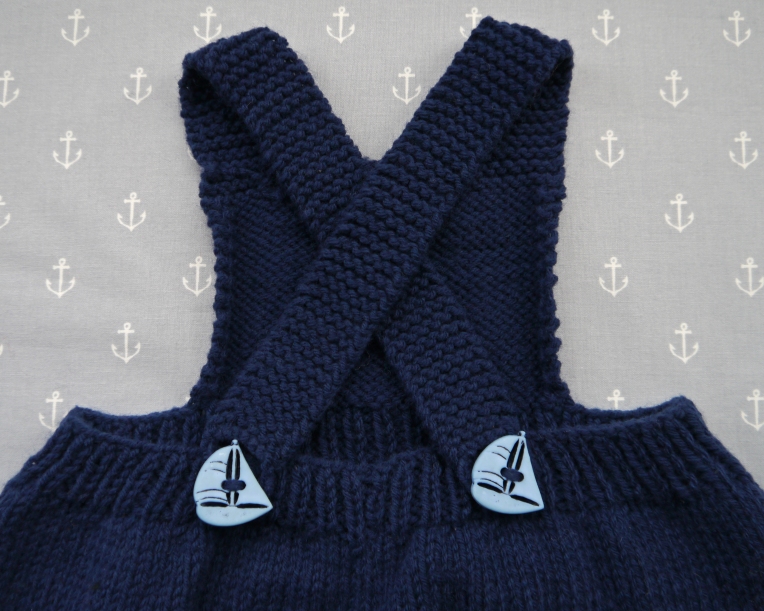
– Make a buttons loop at the end of each strap.
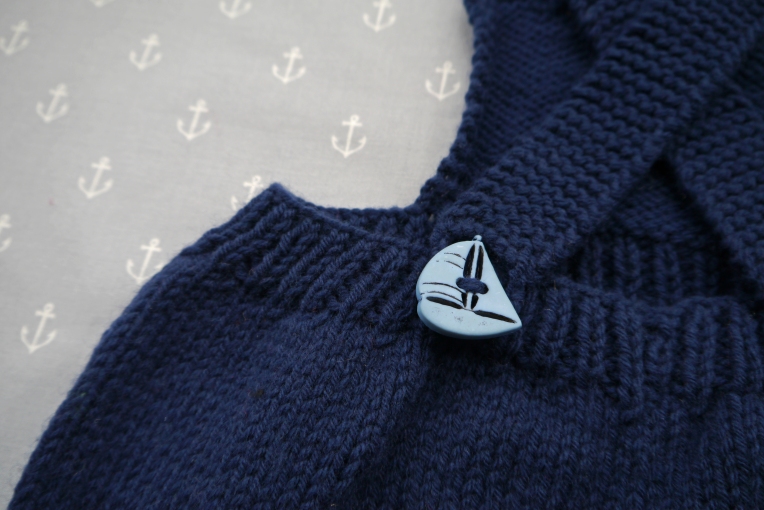
– Crossing the straps over at the back, sew on (cute) buttons to the waistband to correspond with button loops.


Oh I would love to make an adult size sailor dress. One day maybe!
What do you think of this pattern? If you give it a try, I would love to see your pics so please share them on Instagram, Facebook and Twitter.
And do let me know in the comments what patterns you’d like to see next :)
Click here for more patterns!

Hi, would this fit a 5/6 month year old or would it need to be made bigger or smaller? Pregnant with my first baby and would love to knit this for her for winter when she’ll be around 6 months old :) x
LikeLike
Hello, you’ll probably need a slightly bigger size for a 6 month old (according to Google!) – in the original pattern there are instructions for more sizes, if you email me at julietheknits@gmail.com I can send the pattern to you :)
LikeLike
Thank you! Will drop you an email :)
LikeLike
Hi, I’ve emailed you :) thank you!
LikeLike
Hello Julie, I have been learning how to knit during this time of covid, thank goodness for YouTube. I am knitting this dress for my granddaughter for her 1st birthday next month. I am confused with the shape of the bib, I don’t understand what is meant “cast off in rib 39 stitches at the beginning of the next 2 rows. 29 stitches” I’m such a newbie haha. I searched for a YouTube tutorial, I can not find one.
LikeLike
Hi Meg, that’s a great hobby to start this year! I’m gonna try to explain as best as I can. Normally you use the cast off across the whole row to finish your work – this is a partial bind off to shape the bib of the dress which means that you only cast off the first 39 stitches of your first and second row of this section (using the rib method, so you can one off in knit and one off in purl), and you knit the rest of the row as you have been doing in previous rows. Once you have done this, you will get the start of the bib in the middle of your work. Hope this helps, good luck!
LikeLike
Hi,just wondering what size this would knit up,I’m wanting to make it for a 18 month old,could I tweak it? Thanks in advance
LikeLike
Hi Brenda, this pattern would be ideal for a 12 month old baby, so to fit an 18mo, you could cast on 156 stitches (instead of 142) and you’ll have to tweak a few things along the way (making the dress longer etc). I have a scan of the original pattern with the instructions for the bigger size dress, if you’d like me to send you it just email me at julietheknits@gmail.com :)
LikeLike
Hi Julie,Thank you so much for your reply to my email,I would be very greatful if you could send me the original pattern,I’ve well and truly fallen in love with it,and my goddaughter will look lovely in it,Thank you again Brenda X
Sent from my iPad
>
LikeLike
I’ve made this in a plain colour it has knit up lovely and my granddaughter looks gorgeous in it thx you 💖
I wondered if you still had the original pattern as I have been asked to make another in larger size.
Thx x
LikeLiked by 1 person
You’re welcome Sandra! I do have the original pattern somewhere, if you email me julietheknits@gmail.com I’ll send it across :)
LikeLike